In this guide, we will show you how to install and set up a VPN for Windows 10. We offer two setup methods. The first is how to set up an off-the-shelf VPN client. However, if you’re a more advanced user, we will also provide detailed walkthroughs for the three most important manual set up methods: IKEv2, L2TP/IPsec, and OpenVPN.
What do you need to set up a VPN on Windows?
The best and easiest way to set up a VPN on Windows is to subscribe to a service that provides Windows VPN software. To get a subscription with this kind of service, all you require is:
- An email address.
- A password.
- A valid payment method.
Providing you have this, you can follow the steps below.
How to set up a VPN on Windows using a VPNs software
This is by far the easiest method to set up a VPN on Windows. An off-the-shelf VPN client is typically designed to work on Windows 10 PCs and will usually be backward compatible with older machines running Windows 8.1 or Windows 7.
To install this kind of VPN software, follow these steps:
-
Choose a provider that has VPN software for Windows.
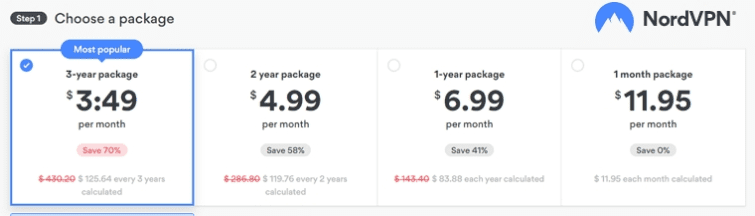
We recommend NordVPN because it has outstanding software for Windows machines at an extremely affordable rate.
![Install vpn windows nordvpn price]()
-
Subscribe to the VPN and set up a password.
![Install VPN Windows NordVPN Account]()
-
Download the Windows VPN software from the provider’s website.
![Install Windows VPN Download NordVPN]()
-
Go to your Downloads folder and double-click the VPN .exe installation file to install the VPN on your machine.
![Install Windows VPN Install NordVPN]()
-
Agree to install any required components.
What you need to install will depend on your VPN provider but could include things like TAP drivers, for example.
-
Double click the icon on your desktop and log in using the credentials you created when subscribing.
![Install Windows VPN Sign up NordVPN]()
-
Once logged in, you are ready to start using the VPN.


What do you need to set up a VPN on Windows manually?
If you prefer to install a VPN manually, you will need to obtain a few things from your VPN provider first, including:
-
Your login credentials
-
A VPN server name & address
We recommend that you opt for L2TP/IPsec, IKEv2, or OpenVPN. For more info, check out our guide to VPN encryption.
-
VPN config files
Once you have the above, you’re ready to start following the steps below.
How to configure a VPN manually on Windows
These details are specific to your VPN, which means that you will need to contact your VPN to ensure that you have everything you need – before you start setting up your VPN manually in Windows. Once you have this information, you are ready to set up the VPN:
-
Navigate to Settings > Network & Internet
![Windows VPN Manual Set up]()
-
Click VPN on the left to open the setup menu
![Manual Set Up Windows VPN]()
-
Click Add a VPN connection
![Add a connection]()
-
In the VPN provider box, select Windows (built-in)
![Windows Built-in VPN Connection]()
-
In the Connection name box, give your VPN connection a name.
Please note: If your VPN provider requires you to connect using a particular name, you will need to use that to continue. Ask your VPN to find out.
-
In the Server name or address box, type in the address that your VPN has given you.
In Windows 10, it is impossible to set up a VPN connection without the URL or IP address of your VPN’s server.
-
Under VPN type, select the protocol that you are currently setting up.
This is your choice but depends on what options are available to you with your VPN provider. If possible, we recommend that you opt for L2TP/IPsec, IKEv2, or OpenVPN.
![Windows VPN Automatic Protocol]()
Please note: Selecting the wrong encryption type can cause issues. If the VPN does not work after you set up, try again and opt for Automatic at this stage instead.
-
In the Type of sign-in info box select Username and password.
Enter your username and password you used when signing up to your VPN.
![Manual Set Up Windows VPN Info]()
With everything now filed correctly, ensure that the Remember my sign-in info box is ticked and click Save in the bottom right.
-
You will now be taken back to the VPN set up screen, where your manual set up will now be present in the list. Click on it and select Connect.
![Connect to Windows VPN Manually]()
-
The VPN will now connect to the server that you set up.


How to set up OpenVPN on Windows 10
OpenVPN is widely regarded as the most secure VPN encryption protocol. This is because it has been audited regularly and is known to be secure against eavesdroppers.
The easiest way to connect to your VPN using OpenVPN is to use the VPN’s custom client for Windows. Most VPNs provide OpenVPN from inside their custom Windows clients. To make sure OpenVPN is the selected encryption protocol:
-
Run your VPN’s software.
-
Click on the settings icon.
-
Select encryption protocols.
-
Now select either OpenVPN TCP or OpenVPN UDP (we recommend the latter because it is faster).
Setting up a Windows VPN in the OpenVPN Client
If, for some reason, you prefer to connect to your VPN service using the official third party OpenVPN client, please follow the steps below:
-
Contact your VPN provider and download the .ovpn config file for the server you require
![Set Up Windows VPN Server List]()
-
Download and install the latest OpenVPN software for Windows from OpenVPN. net
![Set Up Windows VPN OpenVPN]()
-
Once it has installed, click Finish
![Windows VPN set up Wizard]()
-
Run the OpenVPN software that will now appear on your desktop
![Set Up Windows VPN OpenVPN Connect App]()
-
Click on File in the top right of the client, and drag the .vpn file that you downloaded from your VPN provider into the box. Alternatively, click Browse to find the file manually.
![Drag and Drop .ovpn profile]()
-
The client will now say Profile successfully imported.
Enter your Username and password below the server fields and tick the box connect after import.
![Set up Windows VPN OpenVPN Imported Profile]()
-
Once all the fields are filled correctly, click Add in the top right. The VPN will now automatically connect.
-
To connect in the future, run the OpenVPN Connect app and slide the slider to the ‘on’ position to connect.
![Connect and Disconnect OpenVPN Slider]()


How to change protocols on a manual VPN setup
If you have set up your VPN manually, you cannot simply change the protocol. Instead you must set up another manual connection (as described above) using the config information obtained from your VPN provider (for the particular protocol that you want to change to). To do this, ask your VPN for the connection settings information you require and follow the steps above to set up a VPN connection to a server using a different protocol.
If you set up your VPN by downloading the official Windows app, you can change the protocol by following these steps:
-
Run the VPN client for Windows.
-
Click on Settings.
-
Click on Encryption Options or Protocol Settings.
This may be called something different in your VPN software but should be something similar
![Set up Windows VPN protocol settings]()
We recommend that you opt for OpenVPN UDP, OpenVPN TCP, IKEv2 or L2TP/IPsec because these are the most secure protocols available in 2021

How to install a VPN on Windows 8.1 or Windows 7
Official support for Windows 7 is now officially over, which means that using Windows 7 is insecure and could open you up to cyber-threats such as malware and hacking. Windows 8.1 has extended support until Jan 2023. However, that support is not available to most home users. This is because mainstream support for Windows 8.1 ended in 2018.
If you are using a deprecated version of Windows, it is essential that you upgrade as soon as possible. Failure to do so could open you up to exploits and vulnerabilities that could allow hackers to target your system, steal your data, and infect you with dangerous malware.
For this reason, we strongly urge you not to find ways to install a VPN on an out-of-date Windows system and instead, update your system properly to Windows 10 so that it is secure against the most recent threats. Once you have Windows 10 installed, you can use this guide to install a VPN safely.